
How to Configure Custom Fields at Checkout
Steps
-
Log in as Admin at admin.localforyoucarts.com.
-
From the list of accounts, find the account where you want to add a custom checkout field and click “Manage”.

-
In the left-side menu, click “Settings”.

-
Go to the “Services” tab.
-
Select the services you offer (Pickups, Deliveries, Dine-ins, Table Bookings).

-
Go to:
- Custom Checkout Fields for Pickups, Deliveries, and Dine-ins
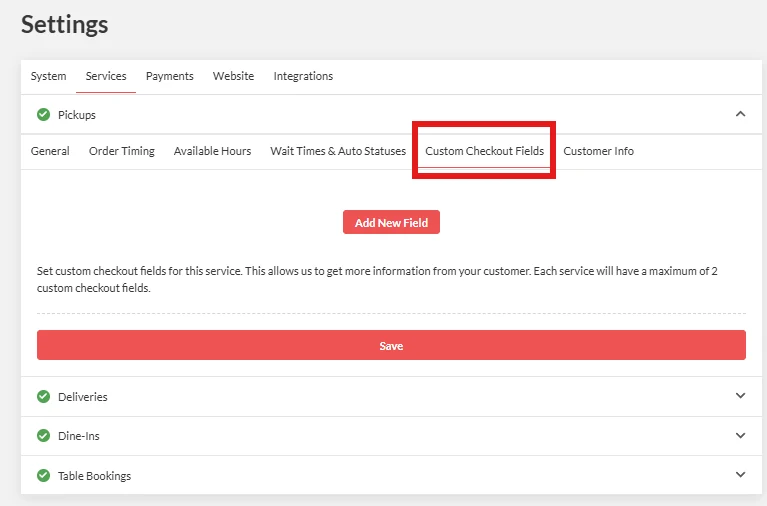
- Custom Booking Fields for Table Bookings

-
Click “Add New Field.”
Note: Make sure to toggle Enable so the field appears on the checkout page.
- Label: Name of the field (what customers will see).
- Icon: Optional icon to display beside the field.
- Description: A short explanation or instruction.
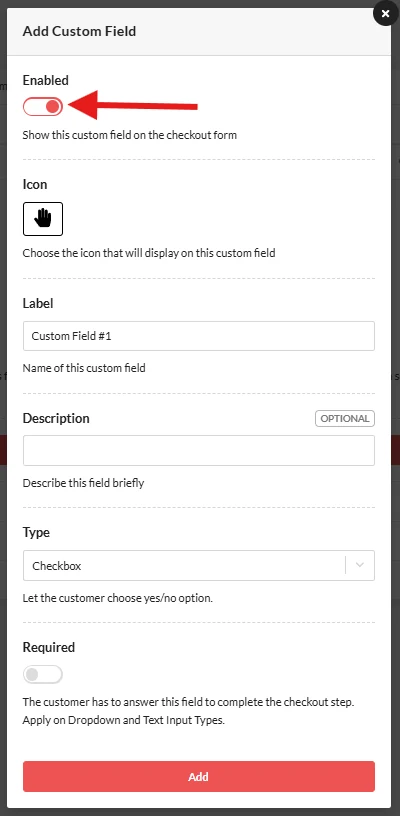
- Type: Choose Dropdown, Checkbox, or Text Input. Each option will require different setup details.

- Required: Enable this if customers must complete this field before submitting their order.
-
Once all details are completed, click “Update.”
Note: You can create up to two custom checkout fields per order.